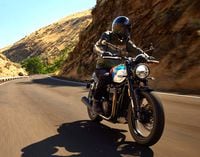
Even the most complicated device starts as a simple construction of two easily understood parts. Take the space shuttle-while it's an incredibly complex assemblage of parts and sub systems, (all supplied by the low bidder, I might add,) it starts with the simple joining of part A to part B. Essentially it's little more than a giant erector set put together by some very gifted children. So it is with troubleshooting.
If you try to troubleshoot something as complicated as the space shuttle, let alone your motorcycle, you're going to be doing a lot of head scratching. However if you reduce it to its various subsystems and component parts it becomes a lot easier. Professional mechanics, whether they work on rockets or bikes, often turn to something called a "Trouble Tree." Trouble trees, which are found in the diagnostic section of your bikes service and owner's manuals are little more than a series of suggestions of what to check next. You proceed down the list checking each system or component in turn until the solution is found, and then the appropriate repair made. What we've done here is assemble a checklist that will help the novice mechanic identify and hopefully correct some of the more common predicaments he or she may find himself in. While it's not as sophisticated as what you might find in an OEM shop manual, it should at least make troubleshooting run of the mill problems a whole lot easier. By the way, while some of the causes and fixes may seem elementary, you'd be amazed at how often they occur, and how often even the most experienced riders overlook them.
| PROBLEM | POSSIBLE CAUSE(S) | CORRECTION |
| Engine fails to turn over -No crank/no start | Kill switch in off position | Turn on the kill switch. |
| Bike in gear with the kick stand down | Retract stand, or shift to neutral. | |
| Blown main fuse | Replace with the correct amperage fuse. Investigate and repair cause of overload before riding. | |
| Loose or dirty battery connections | Tighten and clean as needed. | |
| Dead battery | Charge or replace battery as required. | |
| Failed safety interlock switch(s) | If you're up to it, troubleshoot the clutch and kickstand interlocks. If your bike has a single roll-over switch, it may be wise to contact your dealer, especially if the bike is still under warranty. | |
| Failed starter motor/start circuit | If everything else checks out the starter motor or some component in the starter circuit may have failed. To troubleshoot it you'll need the shop manual and some electrical test equipment. Lacking that, I'd suggest transporting the bike to the nearest shop. | |
| Engine turns over normally but won't start | Out of fuel | Fill tank. |
| Flooded engine | Turn off the choke, hold throttle wide open and crank the engine for five seconds. Try to start the engine normally. If the engine fires, keep it running at a fast idle. If it won't start, replace the spark plugs. | |
| Ignition failure | Total ignition failure is rare these days. The time honored method of checking for spark with a good plug will give you some indication of the system's health but won't tell the whole story. Unless you possess good trouble shooting skills and a well stocked tool box, I'd leave this one to the dealer. | |
| EFI failure/or problem | If your bike is equipped with an EFI warning light and it's on, see your dealer. | |
| Engine won't start after the bike is washed | Water in carburetor float bowls | Drain bowls. |
| Wet ignition system | Spray down plug caps and kill switch with WD40 or the equivalent. | |
| Engine starts and idles fine but stalls when put in gear | Side stand down (don't laugh, I do this all the time) | Raise the stand. |
| Side stand interlock out of adjustment or not working | Adjust, repair or replace as needed. | |
| Engine starts but runs poorly. Problem occurred gradually | All the usual suspects | If the problem occurred gradually it's most likely time for a tune up. Check and replace as required the plugs, air filter and fuel filter. Check valve and carb/throttle body synch as required by the manual. |
| Engine starts but runs poorly. Problem occurred suddenly | Contaminated fuel | If the problem occurred suddenly (like a few a miles after the last fill up) the fuel may be junk. If the bike just feels a little sluggish try running another tank of gas through it, and this time buy it from a major station. |
| Air inlet obstructed | Check the air inlet for debris and make certain the air filter is clear. | |
| Fouled plugs | If the problem occurred immediately after a cold start the plugs may have wet fouled. Let the bike warm up and ride it gently for a few miles, chances are the fouling will burn off. If it doesn't, install fresh plugs. | |
| Poor idle/no idle (bike runs well otherwise) | Improper adjustment | Adjust idle speed and mixture to manufacturer's recommendations. Synchronize carburetors. |
| Dirt or water in carburetor float bowl | Drain bowls. | |
| Plugged jets | Clean jets/carburetor passages. | |
| Tight valve | Adjust. | |
| Engine detonates (pings) under load | Poor quality fuel | Make sure you're using the manufacturer's recommended octane. If pinging persists change brands. |
| Lean mapping/jetting | This is more common after an aftermarket pipe or air box kit has been installed and indicates the need for a jet kit or fuel controller. | |
| Air leak | Check for air leaks at intake manifold and air filter housing and correct as needed. | |
| Engine oil light stays on after engine has started | Low oil | Top off oil, check more frequently. |
| Oil pump failure | Shut down engine, do not ride. | |
| Engine over heats-Air cooled | Low oil | Add oil. |
| Lean jetting | Rejet. | |
| Clogged fins | Clean dirt from between engine fins. | |
| Engine overheats- Water cooled | Coolant low | Top off coolant, repair any leaks. |
| *Most fans are controlled by a temperature sensor, so they can come on any time the engine is warm and the ignition switch is on, even if the engine is off. Watch those fingers! | Cooling fan not working | Blown fan fuse, replace. |
| Bad temperature sensor | Test sensor and wiring to fan, repair as needed. | |
| Thermostat stuck | Test and replace thermostat as needed. | |
| Bad water pump | Replace. | |
| Engine backfires when throttle is closed | Lean pilot circuit | Open pilot screw by 1/2 turn, install richer pilot jet. Install aftermarket fuel module (EFI). |
| Oil leaks from engine breather or fills air filter | Sump overfilled | Reduce oil level to the correct setting. |
| Breather undersized (modified engines) or plugged or damaged | Repair or replace breather check valves (if so equipped), look for pinched breather hose, install aftermarket breather. |
| PROBLEM | POSSIBLE CAUSE(S) | CORRECTION |
| Excessive crankcase pressure | Perform leak down test, rebuild top end as needed. | |
| Excess oil use/smoking | Crankcase overfilled | Drain and refill with correct amount of oil. |
| Worn top end | Perform leak down test and rebuild as needed. | |
| Sudden excess engine vibration | Loose motor mounts | Tighten bolts, install self locking nuts. |
| Carbs out of synch | Synch carbs using vacuum gauges. | |
| Engine out of tune | Service engine. | |
| Clutch slips | Insufficient free-play | Adjust clutch free-play. |
| Worn out plates | Replace as required. | |
| Wrong weight/grade of oil | Drain and refill with recommended type. | |
| Clutch grabs | Too much free play | Adjust to spec. |
| Cable binding | Lubricate cable. | |
| Wrong weight/grade of oil | Drain and refill with recommended type. | |
| Springs too stiff | Replace with lighter springs. | |
| Hard shifting | Clutch out of adjustment | Adjust to specs. |
| Transmission oil viscosity too high. | Drain and refill with recommended type. | |
| Primary case overfilled | Drain and refill with correct amount. | |
| Shift linkage out of adjustment (external linkage) | Adjust. | |
| Shift linkage binding | Lubricate, replace bent/damaged pieces. | |
| Bent shift shaft | This commonly occurs when the bike is crashed and lands on the shaft or shift lever. Normally a bent shift shaft can be replaced without splitting the cases. But you will have to remove the external covers. | |
| ELECTRICAL PROBLEMS | ||
| No electrical power | Dead battery | Recharge or replace battery. |
| Blown fuse | Replace fuse. Investigate cause of overload before riding. | |
| Battery will not hold a charge | Battery water low | Top off and charge. |
| Battery connections loose/dirty | Clean and tighten connections. Protect terminals with dielectric grease. | |
| Battery sulfated | Replace battery. | |
| Battery worn out | To test: first charge, then load test battery, replace as needed. | |
| Charging system overloaded | Reduce the number of electrical accessories or moderate their use. In some cases a high output alternator may be available. |
| PROBLEM | POSSIBLE CAUSE(S) | CORRECTION |
| Charging system malfunction | Test charging system voltage/current. | |
| LIGHTING PROBLEMS | ||
| High or low beam out | Blown bulb | Replace. |
| Bad ground/broken wire | Troubleshoot using test light or voltmeter, repair as needed. | |
| Bad switch | Test with voltmeter and replace as needed. | |
| One turn signal, brake light or indicator | bulb out | Bad bulb/bad ground/broken wire Replace bulb, troubleshoot circuit, repair as needed. |
| Signals light but won't flash | Bad flasher unit | Replace. |
| Signals won't come on at all | Blown fuse | Replace, locate and repair short. |
| Bad flasher | Replace. | |
| Bad switch/wiring | Test and replace as needed. | |
| Electrical accessories don't work | Blown fuse | Replace, check for shorts, make certain the accessory isn't overloading the system. |
| Accessory wiring problem | Troubleshoot and repair circuit. | |
| Accessory failed | Replace. | |
| BRAKE PROBLEMS | ||
| Brakes spongy | Air trapped in lines | Bleed brakes/change brake fluid. |
| Brake hoses deteriorated | Replace with new or better yet, upgrade to stainless steel braided hoses. | |
| Poor stopping | Brake pads or shoes worn out | Check wear indicators, replace pads or shoes as needed. |
| Rotors/pads contaminated | Clean with brake cleaner or lacquer thinner. Lightly scuff brake material and rotor with sandpaper or Scotch Brite pad. | |
| Master cylinder leaking | Rebuild or replace. | |
| Frozen brake caliper | Rebuild caliper, clean all caliper slides and lubricate with appropriate brake grease. | |
| Pulsing brake lever | Rotor bent or warped | Replace. |
| Brake lever has excess travel | Improper lever adjustment | Adjust lever to fit your hand. |
| Low brake fluid | Top off fluid; low fluid usually indicates worn pads or a leak so check the hoses, seals and pads. | |
| Brakes drag | Improper lever adjustment | Adjust free play to specs. |
| Frozen or sticking caliper | Rebuild, replace or lubricate. |
| PROBLEM | POSSIBLE CAUSE(S) | CORRECTION |
| Handling problems Hard, heavy steering, particularly at low speed | Low tire pressures | Adjust. |
| Over tightened steering head bearings | Adjust to manufacturer's spec or to a fall away setting of four pounds. | |
| Dented steering races | Replace bearings and races. | |
| Front fork oscillates during deceleration (low speed wobble) | Loose steering head bearings | Adjust bearings to factory recommended settings. |
| Out of balance front tire | Balance front tire. | |
| Front tire worn out | Replace. Note that the tire may not show excess wear; however it maybe cupped or worn flat across the center. | |
| High speed wobble | Worn out or loose suspension components | Check all suspension mounting hardware and all bushings and bearings. |
| Improperly mounted accessories | Make sure things like windshields and saddlebags are properly mounted and that they are approved for use on your bike. | |
| Improper loading | Load as much weight as you can, as low as you can, top or tour boxes should always be lightly packed. | |
| Wheels wobble | Loose spokes | True wheels, torque spokes. |
| Bad bearings | Replace. |
| PROBLEM | POSSIBLE CAUSE(S) | CORRECTION |
| Front end clunk when brake is applied | Loose steering head bearings | Adjust. |
| Bike won't track straight | Wheels misaligned | Align wheels, if possible using an alignment jig. |
| Worn out swing arm bushings | Replace. | |
| Bent frame | Replace, or have it professionally straightened. | |
| Fork dives excessively during braking or over small bumps. | Too light, broken or worn out fork springs; Insufficient preload | Start by adding preload. If that doesn't help install stiffer springs. Replace broken springs. |
| Compression damping too light | Adjust if possible, if not add oil or change to a heavier oil. | |
| Front fork reacts harshly, feels stiff. | Too much preload | Reduce preload to factory recommended settings. |
| Forks overfilled with oil | Reduce oil level by 50cc until the ride improves. | |
| Fork oil too heavy | Go down one viscosity rating at a time until the ride improves. | |
| Too much compression damping | Reduce two clicks at a time until the ride improves. | |
| Too much rebound damping | This may seem counter intuitive but too much rebound damping prevents the fork from returning to the proper ride height so you lose travel. If you hit a series of small bumps in succession the fork "packs down" and stops responding. | |
| Rear shock too stiff | Springs preload too high | Reduce preload. |
| Springs too stiff | Install softer springs. | |
| Compression/rebound damping off | As above, adjust to factory specs. |
/cloudfront-us-east-1.images.arcpublishing.com/octane/DTN6JPXIQJFXPBR43K4GWBDYJ4.jpg)
/cloudfront-us-east-1.images.arcpublishing.com/octane/PDJNVOWK5VFEBKBUG32CWZEAFI.jpg)
/cloudfront-us-east-1.images.arcpublishing.com/octane/URZBW5LIV5BIXMBTOKHIDHMIPM.jpg)
/cloudfront-us-east-1.images.arcpublishing.com/octane/6KKT5NNL2JAVBOXMZYS5ZO76YA.jpg)
/cloudfront-us-east-1.images.arcpublishing.com/octane/H6Z2IC7WYRBXZNQS4MI3SZ5KPQ.jpg)
/cloudfront-us-east-1.images.arcpublishing.com/octane/IWO5T5PBT5E4HFQ5GK47H5YXR4.jpg)
/cloudfront-us-east-1.images.arcpublishing.com/octane/OQVCJOABCFC5NBEF2KIGRCV3XA.jpg)
/cloudfront-us-east-1.images.arcpublishing.com/octane/F3O2DGLA4ZBDJGNVV6T2IUTWK4.jpg)
/cloudfront-us-east-1.images.arcpublishing.com/octane/ZXYQE3MHLFDSPKNGWL7ER5WJ4U.jpg)
/cloudfront-us-east-1.images.arcpublishing.com/octane/RDF24VM7WVCOBPIR3V3R4KS63U.jpg)
/cloudfront-us-east-1.images.arcpublishing.com/octane/W7RSIBFISNHJLIJESSWTEBTZRQ.jpg)
/cloudfront-us-east-1.images.arcpublishing.com/octane/AERA26ENRNBW3K324YWCPEXYKM.jpg)
/cloudfront-us-east-1.images.arcpublishing.com/octane/YWX3YX7QBBHFXFDMEEEKRG4XJE.jpg)
/cloudfront-us-east-1.images.arcpublishing.com/octane/I7OKI53SZNDOBD2QPXV5VW4AR4.jpg)
/cloudfront-us-east-1.images.arcpublishing.com/octane/IH52EK3ZYZEDRD3HI3QAYOQOQY.jpg)
/cloudfront-us-east-1.images.arcpublishing.com/octane/K2FSAN7OWNAXRJBY32DMVINA44.jpg)
/cloudfront-us-east-1.images.arcpublishing.com/octane/G4XK7JL24FCUTKLZWUFVXOSOGE.jpg)
/cloudfront-us-east-1.images.arcpublishing.com/octane/JJNXVAC27ZCDDCMTHTQZTHO55Y.jpg)
